Written in US Crochet Terms
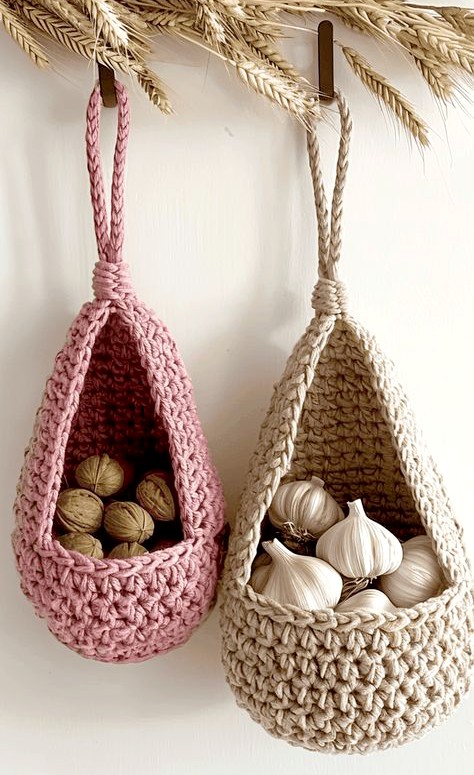
This crochet hanging storage basket is a practical and stylish solution for organizing small items. Using thick yarn and tight stitches gives the basket excellent structure, making it sturdy enough to hold its shape while hanging.
Materials & Abbreviations
Materials
-
Yarn: Bulky Weight (#5) yarn or T-shirt yarn/macramé cord. Thicker yarn provides better structure and durability.
-
Hook: Use a hook size appropriate for your yarn, such as K/10.5 (6.5 mm) or L/11 (8.0 mm).
-
Other Tools: Tapestry needle and scissors.
Abbreviations
-
ch – chain
-
st(s) – stitch(es)
-
sl st – slip stitch
-
sc – single crochet
-
hdc – half double crochet
-
inc – increase (2 sc in the same stitch)
-
dec – decrease (single crochet 2 together)
-
FO – fasten off
1. Basket Base (Oval Shape)
Begin by crocheting an oval base. Work with tight tension to ensure the basket remains firm and structured.
Start:
Chain 16. This chain determines the length of the basket. Add or remove chains if you want to adjust the size.
Round 1:
Sc in the second chain from the hook and in the next 13 chains. Work 3 sc in the last chain.
Now continue along the opposite side of the foundation chain: sc in the next 13 chains, then work 2 sc in the final stitch.
Join with a sl st to the first sc. (32 sts)
Round 2:
Ch 1. Sc in the first stitch, inc in the next stitch. Sc in the next 13 stitches.
Inc in each of the next 3 stitches. Sc in the next 13 stitches. Inc in the next 2 stitches.
Join with a sl st. (38 sts)
Round 3:
Ch 1. Sc in the first 2 stitches, inc in the next stitch. Sc in the next 14 stitches.
(Sc in next stitch, inc in next stitch) repeat 3 times.
Sc in the next 14 stitches. (Sc in next stitch, inc in next stitch) repeat 2 times.
Join with a sl st. (44 sts)
Continue adding increase rounds as needed until the base reaches your desired size, keeping the oval shape consistent.
2. Building the Basket Sides
Once the base is complete, begin working upward to form the sides of the basket.
Round 1 (Defining the Edge):
Ch 1. Working in the back loop only (BLO), sc in each stitch around.
Join with a sl st. This round creates a clear edge where the sides begin.
Round 2 and Following Rounds:
Ch 1. Working through both loops, sc in each stitch around.
Join with a sl st.
Repeat these rounds until the basket reaches your desired height, approximately 6–8 rounds.
3. Shaping the Front Opening
This section creates the angled opening at the front of the basket.
Flatten the Basket:
Fold the basket flat with the joining seam centered at the back. The opposite side will form the opening.
Mark the Center Front:
Place a stitch marker in the center stitch at the front of the basket.
Next Round:
Ch 1. Sc around the back half and sides of the basket until you reach the marked center stitch at the front.
Decreasing Rows (Worked Flat):
Turn your work and begin shaping the opening.
Row 1:
Ch 1. Decrease across the front stitches until only a few stitches remain. Sc in the remaining stitches.
Ch 1, turn.
Row 2 and Following Rows:
Continue working flat rows, decreasing one stitch at the beginning and end of each row (dec over the first 2 stitches, sc across, dec over the last 2 stitches).
Repeat until only 3–5 stitches remain at the top center.
Crochet Hanging Storage Basket Pattern PDF
4. Hanging Loop
Begin the Loop:
On the final shaping row, ch 1 and sc across the remaining 3–5 stitches.
Ch 1, turn.
Create the Loop:
Chain 30–40 stitches, depending on how long you want the hanging loop to be.
Attach the Loop:
Skip the first stitch and sl st into the last remaining stitch on the row.
Reinforce the Loop:
Working back down the chain, sc in the second chain from the hook and in each chain back toward the basket.
Secure the Loop:
Sl st into the remaining center stitches at the top of the pouch.
Fasten off and weave in all ends securely.